HTTPS Security in WordPress
If you’re running a WordPress website in 2026, securing it with HTTPS is no longer optional—it’s essential. Whether you manage a blog, business site, or eCommerce store, HTTPS protects your users, improves SEO, and builds trust.
In this guide, you’ll learn why HTTPS matters specifically for WordPress and how to enable it.
Table of Contents
What is HTTPS in WordPress?
HTTPS (HyperText Transfer Protocol Secure) ensures that all communication between your WordPress site and visitors is encrypted using SSL/TLS.
Without HTTPS:
- Login credentials can be exposed
- User data can be intercepted
- Your site may be marked as “Not Secure”
With HTTPS:
- Data is encrypted
- Visitors see a padlock
- Your site becomes trustworthy
Why HTTPS is Critical for WordPress Sites
Protects Login & Admin Area
WordPress sites are common targets for attacks. HTTPS encrypts:
/wp-adminlogin credentials- User sessions
- Admin activities
Secures User Data
If your site has:
- Contact forms
- User registration
- WooCommerce checkout
HTTPS ensures all submitted data is protected.
Boosts SEO Rankings
Search engines like Google prioritize HTTPS websites. A secure WordPress site has a better chance of ranking higher.
Prevents “Not Secure” Warnings
Modern browsers block or warn users when visiting HTTP sites. This can:
- Increase bounce rate
- Reduce trust
- Hurt conversions
Required for Modern Features
Many WordPress plugins and features require HTTPS:
- Payment gateways (Stripe, PayPal)
- Progressive Web Apps
- API integrations
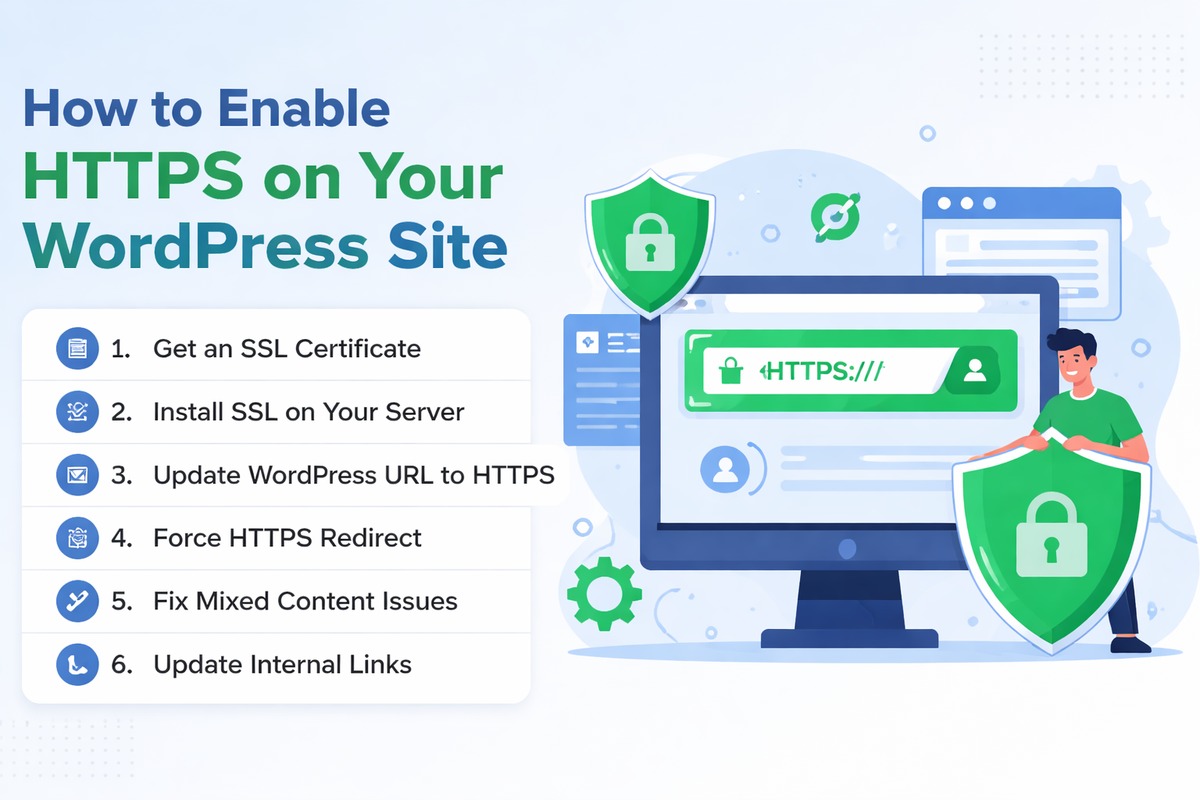
How to Enable HTTPS in WordPress (Step-by-Step)
Step 1: Get an SSL Certificate
You can get a certificate from:
- Let’s Encrypt (Free – most popular)
- Your hosting provider (often included)
- Cloudflare
Step 2: Install SSL on Your Server
Most hosting providers offer one-click SSL installation. If using VPS (like Ubuntu + Nginx/Apache), install manually using Certbot.
Step 3: Update WordPress URL to HTTPS
Go to: Dashboard → Settings → General
Update:
- WordPress Address (URL) →
https://yourdomain.com - Site Address (URL) →
https://yourdomain.com
Step 4: Force HTTPS Redirect
After installing an SSL certificate, you want all visitors to automatically use https:// instead of http://.
Step 5: Fix Mixed Content Issues
Sometimes your site still loads HTTP resources.
Solutions:
- Update database URLs
- Use plugins like:
- Really Simple Security
- Better Search Replace
Step 6: Update Internal Links
Ensure:
- Images
- Scripts
- CSS files
All use https:// instead of http://.
Best Practices for WordPress HTTPS Security
- Enable HSTS (HTTP Strict Transport Security)
- Use TLS 1.2 or TLS 1.3 only
- Keep WordPress, themes, and plugins updated
- Use strong admin passwords + 2FA
- Regularly renew SSL certificates
Common HTTPS Issues in WordPress
When you enable HTTPS on your WordPress site, things don’t always go perfectly. Below are the most common issues you’ll face—and how to fix them.
Mixed Content Errors
What it is: Some resources still load over http://.
Problem: Browser warning + no padlock.
Fix: Update all URLs to https://.
Redirect Loops
What it is: Infinite redirects.
Problem: “Too many redirects”.
Fix:
- Ensure URLs use
https:// - Check server config
- Disable conflicting plugins
Expired SSL Certificate
What it is: Certificate expired.
Problem: “Connection not private”.
Fix:
- Renew certificate
- Enable auto-renewal
Final Thoughts
HTTPS is no longer optional for WordPress websites. It protects your users, improves SEO, enables modern features, and builds trust. By following the steps above and adopting best practices, you ensure your site is secure and future-proof in 2026 and beyond.