
How to use Typography Options in WordPress?
Do you want to know how to use the Typography Options in WordPress?
Tired of using the same old boring font and wish to give your website a new and fresh look? You might have wondered of changing the font, font-family, font size, etc in your WordPress site. Well, WordPress has a special feature named Typography. If you are familiar with WordPress and are its regular user then you must have heard of the feature Typography. It is basically a feature in WordPress that allows its user to change the font style, font family and size of their default fonts in some other style of their choice.
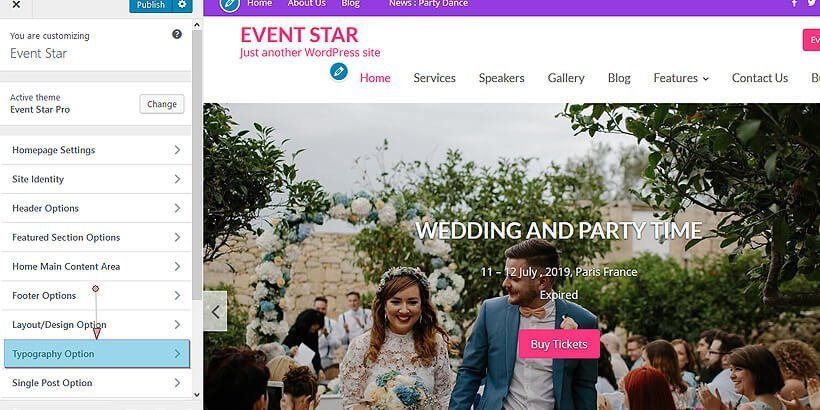
In Acme themes, you will find a typography option in its live customizer where you can update the font design and other aspects of your font. It’s absolutely easy and fun to use. With this feature, you can alter the fonts in different sections of your website smoothly. So, here in this article, we are giving you out the steps in exploring the typography option and changing the look of your website.
Note: This feature is only available in Premium themes.
Now let’s see how the typography options works:
At first after login into your WordPress admin panel,
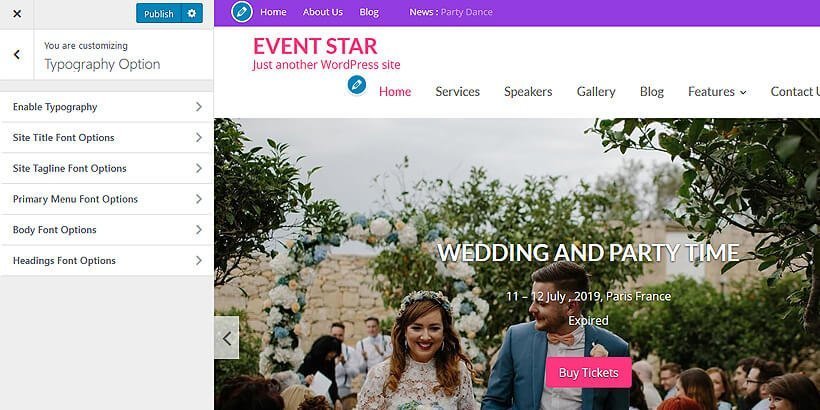
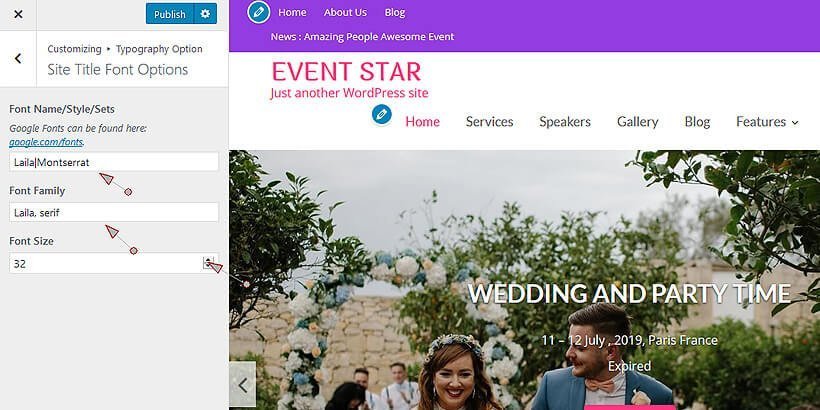
- Go to Appearance->Customize->Typography
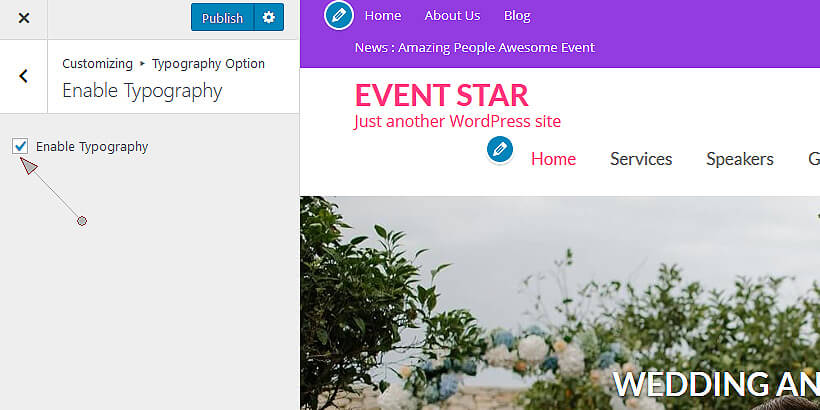
- Enable Typography: Firstly, you need to check the button to Enable Typography to let the typography option.
- Choose any element of your choice.
For example: Site Title Font Options
In this panel, you will find an option to update the font for the title in your site.
Simply go to google.com/fonts
There you will find a huge number of fonts. Google Fonts are probably the best collection of some cool and great fonts.
Click on the red circle button at the top right corner of each font style and it will promptly be downloaded.
- Click on the Family Selected box at the bottom of your site.
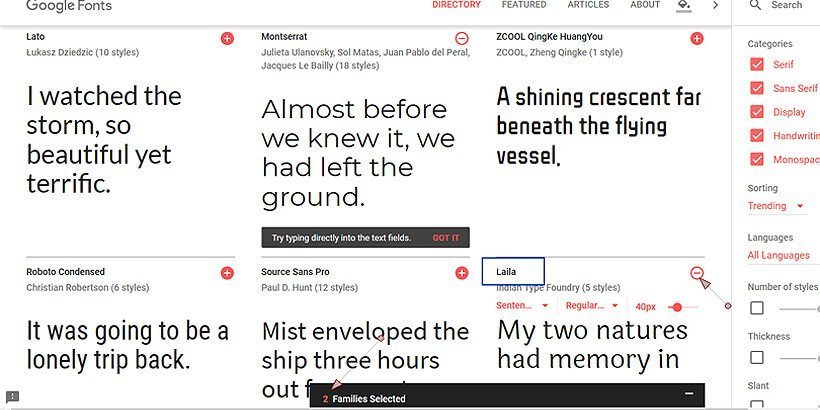
- Click on any one of the downloaded font names and then copy the highlighted text in the Embed Font and the name of the font-family as shown below in the image:

- Now, paste it just under Font Name/Style/Sets
- Also, Copy the font-family text and paste it just under Font Family
- If you want to change the size of the text then you can change it just under Font Size
- Then finally publish the page and update the changes.
- Now visit your site you will find the difference. The font on the title of the site has been updated.
Before editing

After editing

Lastly,
This is how typography option works in the Pro version of Acme themes. Likewise, you can also make similar changes in other elements also like changing fonts styles for site tagline, primary menu, body menu, and headings. You just need to follow the same path as it’s been done for the site title.
Was this article helpful? Let’s hear from by commenting in the box below: