10 Essential WordPress Settings For Brand New Website
Table of Contents
WordPress Settings For a New Website
Right after installing WordPress on your site, you are ready to publish your very first blog. But wait… before you publish the first blog, you have to complete some basic but very important settings for WordPress.
Creating a website is not a big deal, but maintaining the better health of the website in all aspects is crucial. Maintaining better health for the website ultimately results in a better ranking and increases the growth of visitors.
So, configuring these Basic WordPress Settings helps not only in the better ranking in the Search Engine Result Pages (SERPs) but also increase the user experience. So, if you are starting the fresh WordPress website, then you should go through this article in detail. Or even if you are already running the WordPress site, then it might also be helpful at some point.
Here are the 10 essential WordPress settings that we are going to discuss in detail.
- Install the Right Plugins
- Create Essential Pages
- Set up Permalink in the Right Way
- Set up Google Analytics and Google Search Console
- Install Robot.txt and Sitemap.xml
- Set the Right Size Logo and Favicon
- Set Time Zone and User Registration
- Configure the Discussion Section
- WordPress Media Settings
- Publish a Quality Article as a First Blog
1. Install the Right Plugins
After the installation and setup of WordPress, you need to install essential plugins that add extra functionality to the website. But before installing random plugins, you should pick the right plugins for your website. Because broken and inappropriate plugins harm the website.
One tip for choosing the right plugin is to check the rating of the particular plugin. This way, you can guess that lots of other people are using it. Also, you should check when the last time the plugin was updated. If the last plugin update is way long back then, the developer might no longer be working for that plugin. So, no point in using such plugins.
Another important thing to remember is that installing lots of plugins results in making the website heavy, slow, etc. So, delete all the unnecessary plugins and themes so as to make the website lighter.
Tips for choosing plugins
- Check the rating
- Check the last update
2. Create Essential Pages
The second most important thing to do before publishing the first blog is to create essential pages like About, Privacy Policy, Terms and Conditions, Contact Page, Affiliate Disclaimer (If you are running some kind of Affiliate Programs), GDPR compliance, etc.
Creating these pages with detailed content helps your website prove to be authentic. Also, when you apply for some affiliate programs, partnerships, and monetize your blog, the second party clearly checks for these pages. Having these pages also lets your potential and existing customers know more about you.
3. Set up Permalink in the Right Way
Permalink setting of WordPress lets you set how the permanent URL structure of your individual posts, pages, category and tag archives will be. Permalink structure plays a great role in SEO and site ranking as the URL is the gateway for the web crawler.
“Permalink” – the name itself suggests that this is the permanent link of each post (Uniform Resource Locator-URL). It is also called the web address of the post that should not be changed once it is set. The following figure shows that example of URL.
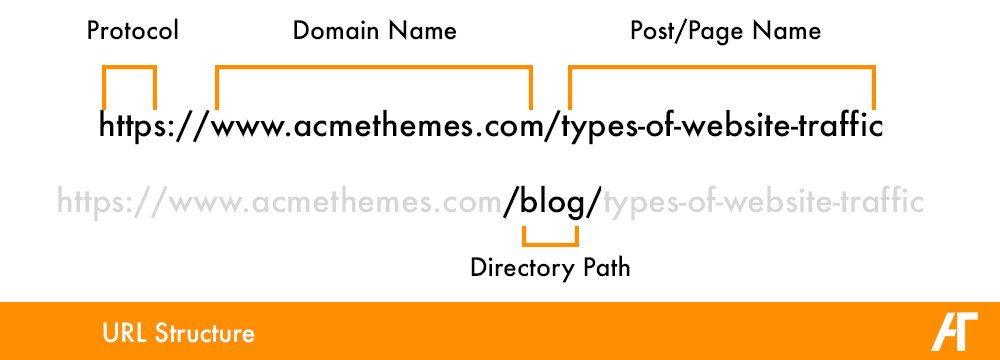
The WordPress Settings Permalinks allows you to choose your default permalink structure. You can choose from common settings or create custom URL structures. Once you choose the setting, WordPress automatically chooses the permalink structure that you configured.
In WordPress, you will find the permalink setting in Settings>Permalink
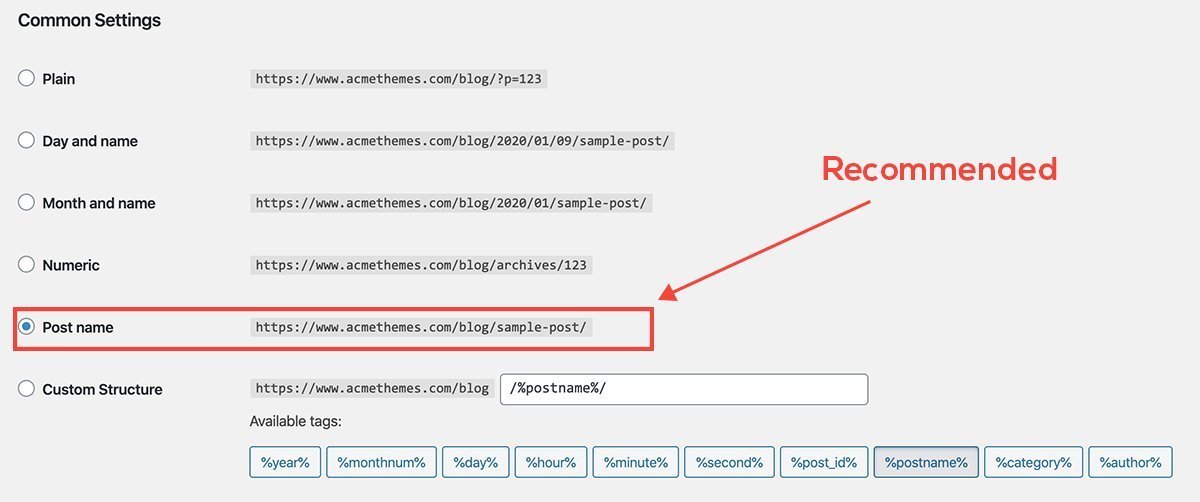
We recommend setting the Post name as the default. Permalink according to the post name is considered to be better for SEO purposes.
4. Set up Google Analytics and Google Search Console
Another important thing to do right after the installation of WordPress (new website) is to configure Google Analytics and Google Search Console. Google Analytics is the most popular tool by Google used to measure visitors to your website. By using Google Analytics, you can track visitors, how they came to the site, where they are from, which demographics, the most popular content, and lots of other results.
Google Search Console, on the other hand, is a tool by Google that helps you to monitor, maintain, and troubleshoot your site’s presence in Google Search results
5. Install Robot.txt and Sitemap.xml
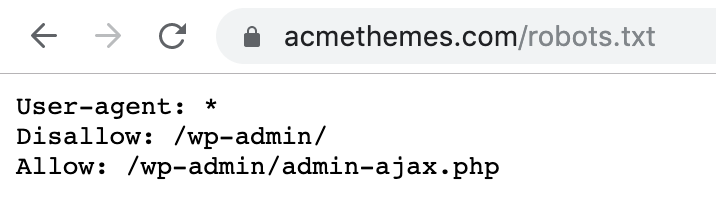
Installing robot.txt will help your site establish communication with web crawlers and other web robots. Robot.txt is a small file that allows the website owner to specify the pages or areas of the website to be blocked from scanning or processing. It also tells web robots which pages to crawl. The slash after “Disallow” tells the robot not to visit any pages on the site.
Example of the robot.txt page looks as below –
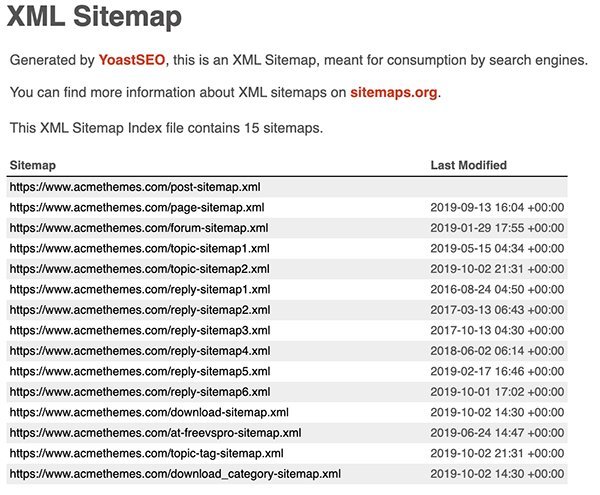
Also, install sitemap.xml or sitemap.html. SEO plugins like Yoast automatically create a sitemap.xml file for your website. Basically, A Sitemap is an XML file that lists the URLs for a site. It allows webmasters to include additional information about each URL: when it was last updated, how often it changes, and how important it is in relation to other URLs in the site.
Check the sitemap.xml file here.
6. Set the Right Size Logo and Favicon
The position and size of the logo may vary from theme to theme, but placing a right-sized logo helps your website to look professional. Some theme comes with the option to place the logo in the center of the headers, whereas most of the themes put the logo on the left side of the header.
Some people simply put the text the tagline as the logo, but since the logo represents the overall branding of your website, it is important to place a quality logo on the site. So, placing the right resolution and the right size logo will help your site to look professional.
Also, you need to set a favicon. Because a favicon helps in improving user experience. It is much easier to find the needed bookmark by image, associated with a certain website, rather than looking through different URLs.
You can set the logo and Favicon from Appearance>Customize>Theme Settings or Site Identity
![]()
7. Set Time Zone and User Registration
You can set your timezone from Settings>General> Timezone section of the Dashboard. One of the benefits of setting the timezone to your local time is that when you schedule posts, they will be published according to your time. At the same time, you can configure the date format and time format.
Another setting is the user registration section. You will find this setting in Settings>General
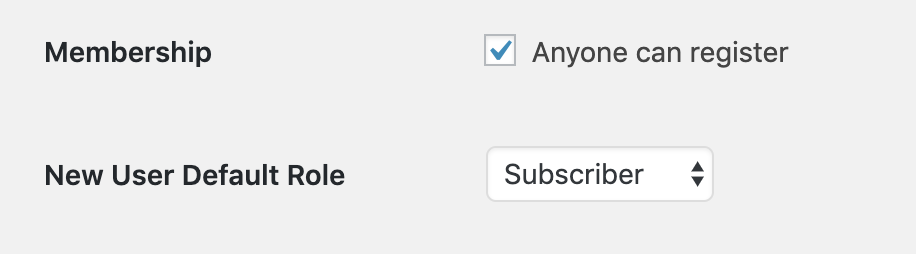
You need to decide if you are going to have a multi-author blog or a sole author. You have got two options: Membership and New User Default Role. If you want to allow anyone to join, then you can tick the membership to Anyone Can Join and set the default role.
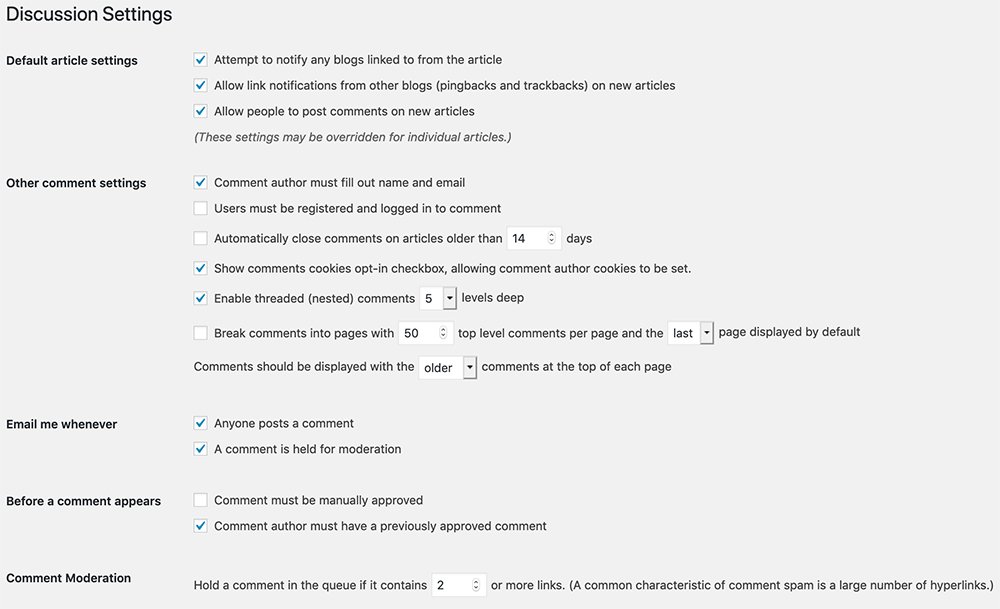
8. Configure the Discussion Section
Another important setting in WordPress before publishing is configuring the discussion section. In the WordPress site, you get lots of spam comments, so you should configure it in a way that you stop getting spam comments. There are lots of plugins that stop spam comments; however, you can also control these types of comments. You can even block the users from commenting on specific posts.
Settings>Discussion
9. WordPress Media Settings
WordPress media settings help you handle the images you upload. By default, WordPress creates multiple sizes for every uploaded image. This is not a good practice. This will load up your blog with unnecessary files, and your blog will quickly become bloated. So, you can configure the media settings to keep in optimum quality.
Go to Settings > Media, and use the below screenshot to configure the proper settings:
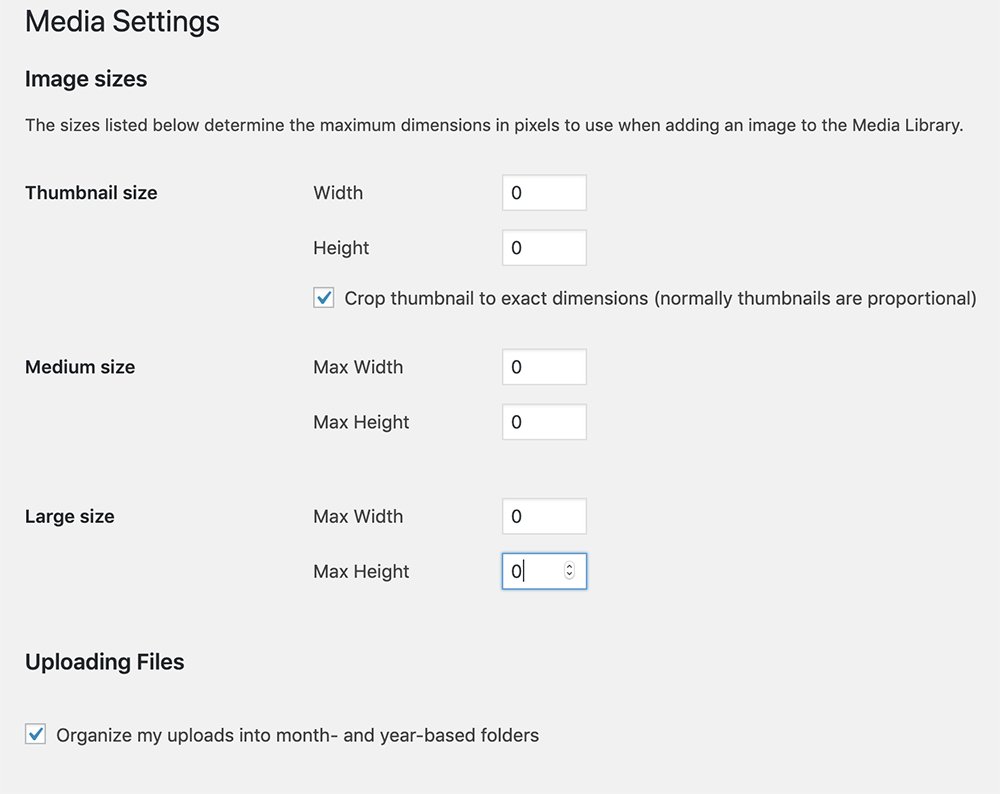
Media Settings can work with the design of the site to limit image sizes to the appropriate width and height. This is one of the ways that will help to ensure that images that are too big do not distort the display of the website.
10. Publish a Quality Article as a First Blog
After setting up all the necessary settings, you now focus on producing Quality, Engaging, Original, and Helpful content for users. While publishing the first blog, you should consider the essential SEO guidelines so that youcan start pushing even better content right after.
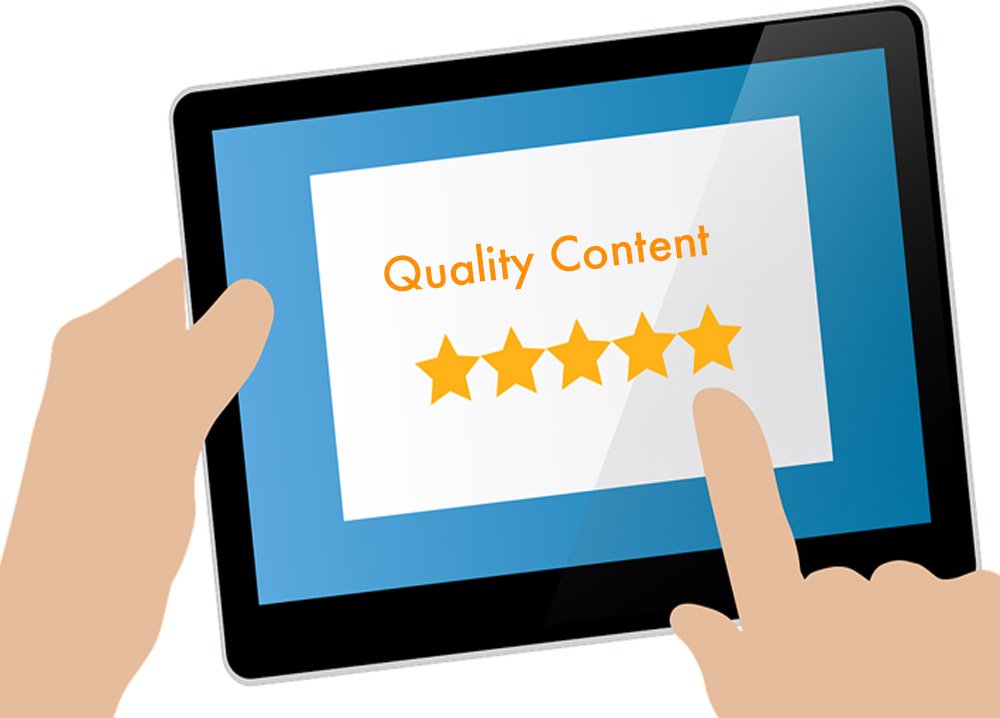
Here, the meaning of quality content is content that creates value for the targeted customers. Engaging content means somehow, that content should engage the reader by providing relevant images/infographics, GIFs, and videos.
Check these 40 In-depth Infographics Ideas to create stunning infographics for your content.
Another important thing to consider for quality content is to write the original post based on the research and study. Rather than being copied from here and there.
Lastly, helpful content means that it should solve the user’s problem that they are looking for.
Conclusion!
So, these are the basic but very important WordPress settings you should configure before publishing content. These essential settings will help in the better ranking in Search Engine Result Pages and also increase user experience.
There are other guidelines while you publish the post that you should take care of. But these are just actions that should be taken before starting to publish the content on the website.
If you have any queries regarding the themes, plugins, and other WordPress-related issues, you can join our Forums section.
Other Posts:
- Types of Website Traffic
- 20+ Best Magazine WordPress Themes
- 15+ Best Premium WooCommerce WordPress Themes